Knowing how the machine works and what each part does helps you use it better. It also helps you fix problems more easily.
Key Takeaways
Pelletizing extruders change raw plastics into small pellets. The pellets are all the same size. This makes them easier to use in many ways.
Knowing the main parts helps make better pellets. These parts are the hopper, screw, barrel, die, cooling system, and knife system.
Keeping the feed rate steady is very important. The screw speed must also stay the same. This helps make even pellets and stops machine problems.
Good cooling is needed to harden the pellets fast. This helps the pellets keep their shape and stay strong.
Doing regular checks helps the extruder work well. You should check screws and clean the die often. This keeps the machine running and makes it last longer.
Pelletizing Extruder Process Steps
A pelletizing extruder turns raw plastic into small pellets. It does this by using a few main steps. You can follow these steps to see how the machine works.
Feeding and Melting
First, you put raw plastic into the hopper. The machine has a screw that moves the plastic forward. As it moves, the screw pushes the plastic and takes out air. The barrel gets hot and melts the plastic. The screw also makes heat by rubbing the plastic.
Tip: If you feed the plastic evenly, you get pellets that look the same.
The screw inside the pelletizing extruder has three parts:
The feeding zone pushes the plastic forward.
The compression zone melts the plastic and removes air.
The metering zone builds pressure and keeps the flow steady.
Twin screw extruders mix the plastic even better. They have two screws that turn together. This gives more even heat and better mixing. It helps make pellets that are all the same.
The temperature you need depends on the plastic type. Here is a table with melting points for common plastics:
Plastic Polymer
Fundamental Melting Point (°C)
Practical Melt Temperature Range (°C)
Key Processing Notes
ABS (Acrylonitrile Butadiene Styrene)
105 – 107 (Tg)
210 – 250
Avoid prolonged exposure above ~270°C to prevent degradation.
Polycarbonate (PC)
155 – 160
280 – 320
Must be dried thoroughly to prevent hydrolysis; requires high mold temperatures (80-110°C).
Polypropylene (PP)
160 – 165
200 – 260
High volumetric shrinkage; requires sufficient pack/hold pressure.
Nylon 66 (PA66)
260 – 265
280 – 310
Extremely hygroscopic; requires immediate pre-drying and hot molds (70-100°C).
Polyethylene (HDPE)
130 – 135
210 – 260
High shrinkage; proper cooling design critical.
Polyoxymethylene (POM)
165 – 175
190 – 220
Prone to thermal degradation; avoid excessive temperatures and residence times.
Acrylic (PMMA)
160 – 170
220 – 250
Hygroscopic; must be dried to prevent defects; high flow resistance.
Polybutylene Terephthalate (PBT)
225 – 230
240 – 270
Hygroscopic; requires pre-drying; prone to warping.
Polyetheretherketone (PEEK)
340 – 380
370 – 400
Requires very high processing temperatures and drying.
Thermoplastic Polyurethane (TPU)
120 – 140 (Tg)
180 – 220
Hygroscopic; sticky melt requires special gating.
Polyvinyl Chloride (PVC)
160 – 180 (Tg)
170 – 210
Poor thermal stability; requires precise temperature control and corrosion-resistant equipment.
Extrusion Through Die
When the plastic melts, the pelletizing extruder pushes it through a die. The die shapes the melted plastic into long strands or other shapes. The die’s design controls the shape and size of the plastic. If you use a round die, you get round strands. If you use a rectangle die, the corners might round off because of how the plastic moves.
Note: The die must be strong and last a long time. Many dies use tungsten carbide inserts for tough plastics with glass fibers.
The die’s heat and how it heats up also matter. If the die heats unevenly, the plastic can come out the wrong shape.
Cooling the Extrudate
After the plastic leaves the die, it is still hot and soft. You need to cool it fast so it gets hard. The pelletizing extruder can use different ways to cool:
Underwater Pelletizers: The die and cutter are in water. The water cools the pellets right away.
Strand Pelletizers: The plastic strands go in a water bath, then air dries them before cutting.
Die-Face Pelletizers: The machine cuts the pellets at the die face. Air or water mist cools them, or they drop into a water bath.
If you cool the plastic too fast or too slow, the pellets can bend or shrink. This can make them the wrong size or shape. Good cooling helps you get pellets that are strong and all the same.
Cutting into Pellets
The last step is cutting the cooled plastic into small pellets. The pelletizing extruder uses different cutting systems:
A method that influences the uniformity and quality of the granules.
Horizontal Water Ring Cutting
Uses water to cool and cut the extrudate into pellets.
Underwater Cutting
Cuts the cooled strands underwater for uniform pellet size.
You can also find these cutting methods:
Gantry cutting
Horizontal water ring cutting
Underwater cutting
Each way helps you get pellets that are the same size. Pellets that are all the same are easier to handle, store, and use in other machines.
Summary: You feed raw plastic into the pelletizing extruder, melt it, shape it with a die, cool it, and cut it into pellets. Each step changes the plastic from raw material into finished pellets you can use for many products.
Main Components of a Pelletizing Extruder
Hopper and Feed Throat
You begin by putting raw plastic into the hopper. The hopper stores and feeds the plastic. It keeps the plastic clean and safe from dirt. The bottom of the hopper fits with the feed throat. The feed throat connects to the extruder barrel. This setup helps the plastic move smoothly.
The hopper controls how much plastic goes in. This stops too much or too little plastic from entering.
Tip: A good hopper and feed throat help your pelletizing extruder work well.
Design Strategy
Impact on Material Flow
Tapered interface in feeders
Gives even feeding and stops holes from forming
Rotary valves with spool piece
Stops clumps and keeps the plastic moving
Vibratory feeders with transition throat
Helps the plastic flow and keeps the speed steady
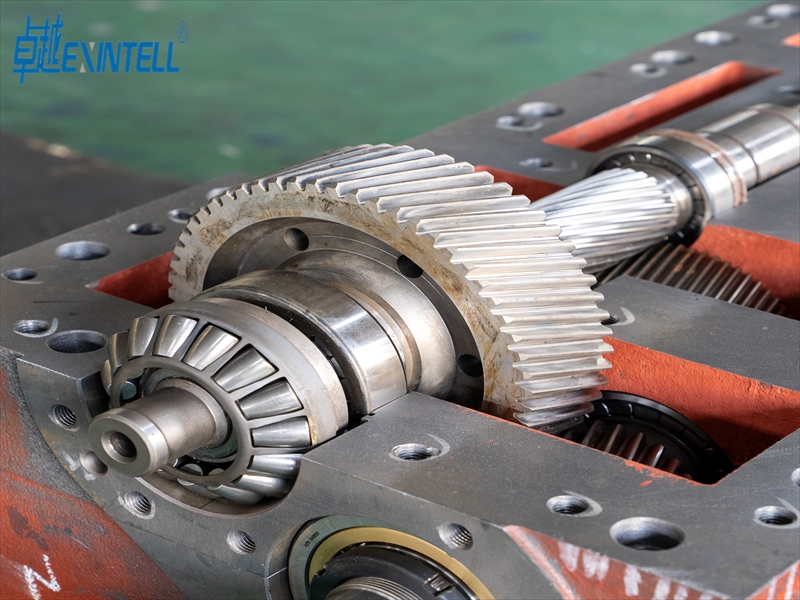
Screw and Barrel
Inside the pelletizing extruder, the screw and barrel work together. They move, melt, and mix the plastic. The screw has three main parts:
Feed Zone: This part grabs the plastic and pushes it forward.
Compression Zone: Here, the screw squeezes the plastic and removes air. This makes the plastic melt evenly.
Metering Zone: This part builds pressure and keeps the flow steady before the die.
The barrel goes around the screw. It heats and softens the plastic. The barrel also helps mix the plastic for a smooth melt.
Factor
Description
Screw Geometry
The screw’s shape and angle change how the plastic moves and mixes. Small angles mix better but wear out faster.
Kneading Blocks
These parts mix the plastic more by making it rub together. More blocks or bigger angles mix more but use more energy and heat.
Temperature Profiles
You must control the heat in each part. Too much heat can hurt the plastic. Not enough heat leaves it unmelted.
Note: The right screw and barrel help you make good pellets and waste less.
Breaker Plate and Adapter
After melting, the plastic goes through the breaker plate and adapter. The breaker plate is a metal disc with many small holes. It does several things:
The adapter, also called the feed pipe, links the barrel to the die. It guides the melted plastic to the die and keeps the flow steady.
Tip: A clean breaker plate and adapter help you make strong, even pellets.
Die System
The die system shapes the melted plastic before cutting. The die has some important parts:
Open Area: This is the size of the die’s hole. It changes the pressure and how thick the product is.
Land Area: This part shapes the plastic as it leaves the die. It helps make pellets that look and work the same.
Material of Construction: The die’s material changes how much rubbing and pressure the plastic gets.
You need to keep the die system in good shape. Cleaning and checking it often stops problems and keeps pellet quality high. If the die has problems, the pellets can change in size, strength, or shape.
Note: The die system is one of the most important parts of your pelletizing extruder.
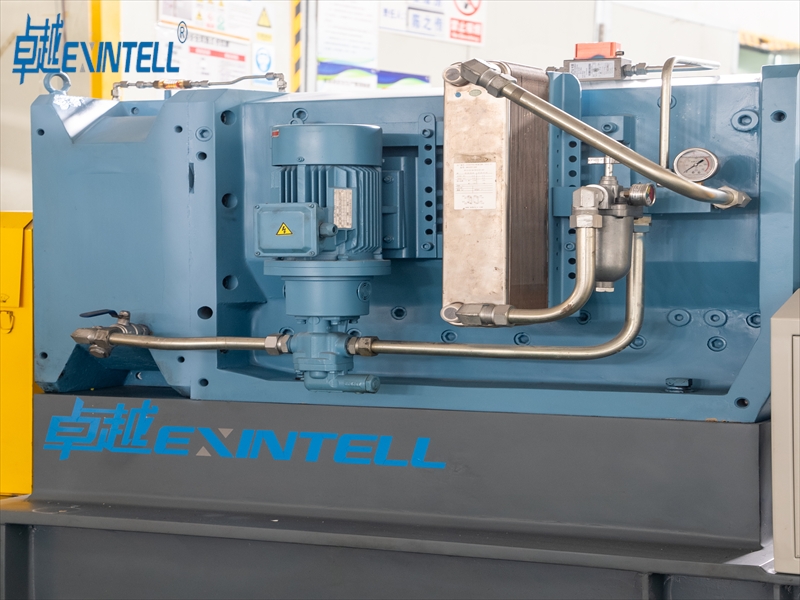
Cooling System
When the plastic leaves the die, it is still hot. The cooling system makes the plastic hard so you can cut it. There are different ways to cool:
Air-cooled systems: These use fans or blowers to cool the plastic.
Water-cooled systems: These drop the plastic into water tanks. Dryers then take off the water.
Fluidized bed dryers: These blow air through the pellets as they slide down a slope. You can change the slope to control how long the pellets stay in the dryer.
Some systems reuse water to save energy. Automatic controls can change cooling based on what you need, which also saves energy.
Evidence Point
Description
Optimizing Cooling Resources
Saves energy and helps the machine work better.
Automated Controls
Uses just the right amount of cooling.
Closed-loop Systems
Uses water again and again, saving water and energy.
Tip: Good cooling keeps pellets strong and saves energy.
Rotating Knife System
The rotating knife system cuts the cooled plastic into pellets. This system has sharp, fast knives that slice the plastic as it comes out.
Sharp, well-set knives stop problems like tails or dust and keep the machine running.
You need to keep the knives sharp and at the right speed. If the knives get dull or slow, you get uneven pellets and more stops. If the knives are too fast or not lined up, you get problems or jams.
Note: The rotating knife system is very important for making good pellets and keeping your pelletizing extruder working well.
How Components Work Together
Material Flow and Homogenization
All the parts of the pelletizing extruder must work together. This helps the plastic move smoothly and mix well. The screw pushes the plastic forward and mixes it. You can change how fast the screw turns to mix more or less. Kneading blocks inside the screw help blend the plastic. Their shape and how you set them up help the plastic mix better.
You can change the speed to control mixing and keep flow steady.
Kneading Block Geometry
Special shapes help mix the plastic evenly.
Convective Mixing
The design moves plastic through mixing zones again and again.
Continuous Circulation
All plastic passes through strong mixing areas many times.
Modular Screw Design
You can change the screw parts for different plastics.
Kneading Block Configurations
Different setups give strong mixing for the right pellet quality.
Sometimes, mixing can be hard. If you mix too much, you can break fibers or make dust. Too much mixing can also make the plastic too hot. Gentle mixing is better for soft plastics. Some plastics, like ultra-low melt flow HDPE, move slowly. These need more pressure to flow.
Pellets are made by cooling and cutting the plastic after it leaves the die. The cooling system makes the plastic hard so knives can cut it. Good cooling systems help keep pellet size and shape the same. Automatic controls can change the process as it runs. This helps you get better pellets and waste less.
Evidence Type
Description
Advanced Cooling Systems
These cool pellets quickly and keep their shape.
Automated Control Systems
These adjust settings for better quality and less waste.
High-Efficiency Heaters
These heat the plastic evenly for smooth extrusion.
You need to collect and handle pellets carefully so you do not lose them or get them dirty. Use good tools and keep the area clean. Closed walkways and sealed pipes stop pellets from getting out. Teach workers to use spill guards and know what to do in an emergency.
Tip: When every step works together, you get strong, clean pellets and a safer place to work.
You turn raw plastic into even pellets by doing five steps: feeding, melting, extruding, cooling, and cutting. Each main part—hopper, screw, barrel, die, cooling, and knife system—has an important job. Taking care of your extruder helps it work well:
Look at screws and sleeves to see if they are damaged.
Make sure raw materials are clean so nothing bad gets in.
Watch for worn parts and change them before they break.
If you know about pellet quality and how to control moisture, you can work faster and make fewer mistakes. Use these tips to keep your machine working well and making good pellets.
FAQ
What types of plastics can you use in a pelletizing extruder?
You can use many plastics in a pelletizing extruder. Some examples are polyethylene, polypropylene, nylon, ABS, PLA, and TPU. Each plastic needs its own temperature and settings. Always check what your material needs before you start.
How do you keep pellets uniform in size?
You need to feed the material at a steady rate. Keep the screw speed the same. Clean the die and knives often. Use automatic controls to help with cooling and cutting. This gives you the best results.
Why does the extruder need a cooling system?
The cooling system makes the melted plastic hard. If you do not cool it, the pellets stay soft and stick together. When you cool them fast and evenly, you get strong pellets. These pellets are easy to handle.
How often should you maintain the pelletizing extruder?
Check and oil the bearings every 500 hours.
Look at the screws and knives every week.
Clean the hopper and die after each batch.
Doing these things helps your machine work well.
Can you use recycled plastics in a pelletizing extruder?
Material Type
Suitability
Notes
Clean Recycled
Yes
Dry and filter before use
Mixed Recycled
Sometimes
May need sorting and cleaning
Contaminated
No
Can damage machine
You can use recycled plastics if they are clean and sorted.